The Tayberry

Image

Tayberries are a hybrid, first developed in 1962 by Derek Jennings, a botanist at the Scottish Horticultural research institute and David Mason, a fellow researcher. It wasn’t until 1979 that the Tayberry was commercially released. The hybrid was named after the Scottish River Tay.

The original tayberry is a cross between the Aurora blackberry and a polyploid Malling Sport Raspberry. There are of course many different types of Tayberry today. Even a thornless variety called Buckingham. We have two tayberry plants, bought a couple of seasons ago, and they a rather large and thorny variety. I don’t remember the actual variety, but they currently resemble an octopus. I often get snagged when passing them as their ‘tentacles’ blow around in the breeze. Which reminds me, I really must tie them up!

Tayberries are pretty easy to please; they’re not too fussy about soil type, providing it’s free draining. They prefer to be in full sun but will tolerate partial shade. Tayberries grow fairly large, so if space is an issue, it’s possible to have one plant because they are self-pollinating. These plants should remain productive for 15 to 20 years.

Tayberries grow like summer raspberries and blackberries; they are floricanes. Floricane means a plant stem that grows a year before it bears flowers or fruit. Tayberries don’t grow canes like raspberries but LONG bramble stems, up to 6 to 7 feet, much like a blackberry. Care is required when pruning. On our first season we accidently treated them like a primocane. Primocane means, plant stem that bears flowers and fruit on the first seasons growth. All stems were pruned down to about a foot from the ground and we ended up with about 20 berries the following season. There may not have been many berries but they made a rather delicious snack whilst pottering around the plot. So last year we didn’t prune them at all, and we have long stems covered with flowers this season.

The Tayberry produces a large cone shaped reddish-purple fruit. The fruit tastes divinely sweet and aromatic. They flower in April/May. Fruit should be ready to harvest from July to August depending on the weather conditions. Birds are rather partial to eating soft fruit, so after flowering it’s worth covering the plant with netting to protect your crop.

Tayberries are difficult to harvest commercially as the fruits are exceptionally soft when fully ripe. It’s very unlikely you will ever see tayberries for sale in the shops, but you may be lucky enough to find them at some farmers markets.

In terms of aftercare there are a few jobs that need to be attended to.

In the autumn, prune the stems that produced fruit and tie in the new seasons stems into supports. Tayberries can become a tangled octopussy mess if they are allowed to go ‘wild’! It’s also important to keep good airflow between the stems to help maintain a healthy plant.

In spring apply some well-rotted manure around the base of the plant. This will help retain moisture and give the plant some extra nutrition. Continue to tie in the growing stems into their supports.

In the summer, cover with netting to protect your crop from those pesky birds who will want to consume those delicious berries before you do! Pick the berries when ripe and eat as soon as possible. They are soft and don’t store particularly well. Enjoy fresh with vanilla ice cream or have them for breakfast, or make jam….. they can also be frozen, not that i can see that happening.


Posted in Tayberry

Leeks. Oops!

We have been meaning to dig out the remaining leeks on plot two for a few weeks but with one thing and another they’ve just been forgotten. Ideally leeks that have been overwintered should be dug up by the end of March. And this is why….

Walking past the leeks the other day I noticed that a couple of them have produced a flower stalk.

Image

Leeks are biennials. Sow seeds in early spring and look to plant the young leek seedlings at the allotment by early to mid summer. Leeks stay in the ground for a long time. Some hardy varieties can be left to overwinter. It is in fact the cold winter weather that triggers leeks go to seed. Leeks naturally grow a flower in the spring, during it’s second year, following a period of cold weather.

This highlights the importance of sowing seeds at the right time of year. Make sure temperatures are 45F or above. Subjecting leeks to premature cold conditions can cause them to bolt, as the cold temperature will confuse them into thinking it’s time to flower.

Leeks can still be eaten when they flower, but the flesh becomes fibrous and tough, and it develops a bitter taste. Yum! There’s also a massive hard flower stem running through the middle of the leek…. I think the best thing for them now is to either to let them flower. The flowers are magnificent and attract bees and other pollen loving insects. Or they shall be composted if we need the space.


Posted in Leeks

Bindweed

Whilst bindweed is a ‘pain in the proverbial’ for gardeners, I thought it was worth writing a short piece about why I think it’s an incredible plant, despite being rather challenging.

There are two types of bindweed both of which are ‘pernicious’ perennials.

Hedge Bindweed or Bellbind (Calystegia sepium)

Image

Hedge bindweed has large pure white trumpet shaped flowers and its heart shaped foliage is often seen twining up and around any plant, post, tree, and hedge, choking everything in its path.

Field Bindweed (Convolvulus arvensis)

Image

Field bindweed has much smaller, pretty pink and white candy stripped trumpet shaped flowers, very fitting for a seaside allotment. It has very similar foliage to the hedge bindweed. As the name suggests, this bindweed grows along the ground, sending out shoots several metres long.


Of course we inherited both types at the allotment, along with brambles, dock and couch weed! It has certainly been a challenge to get this particular weed under control, and the reality is, we may never get rid of it completely.

When we acquired the orchard plot, much of it was covered with carpet and underlay. We were pleased because we thought this would make this plot much easier to clear and dig over. However, underneath the carpet we found what looked like masses of cables. These were in fact bindweed roots, and these were just the bits we could see.

Image

So why is bindweed such an impressive weed? Simply, it’s incredibly resilient. Over the years it has evolved to survive the harshest of conditions and it seems to be indestructible.

In it’s first year the bindweed produces a tap root that can descend 1.2 metres. In two and half years the tap root can descend down to 4 or 5 metres. So even in the toughest drought and intensely cold conditions, when many other plant species are struggling to survive, these plants can seek water to survive.

Additionally, the root system is extensive. The plant produces vast ‘nests, of zigzagging white rhizomes, these lay around 30cm below the soil surface. In the plants first season this root network may expand as much as 3 metres in diameter. Additionally, this root system can produce as many as 25 ‘daughter’ plants, creating it’s own ‘colony’ of bindweed plants. The roots of older plants can spread as wide as 6 metres in diameter. Imagine how massive the colony of bindweed will be by then!

The roots have interior buds that develop into shoots, stolons or remain dormant. These buds are most active during the spring and summer when temperatures rise above 57F.

Once active, the shoots are ready to start breaking up through the soil and get twining. The stolons, otherwise known as stems or roots, grow at surface level or just below surface level. They zoom across the surface, several metres at a time. When they hit an obstacle such as another plant, tree or fence, they push down and generate a new root system. A new shoot appears ready to twirl around the new climbing opportunity. It’s usual for another 2 or 3 shoots to appear, eventually covering the new structure. Bindweed will literally smother anything that comes into its path as it searches for light.

The other problem arises when digging out the root. By leaving even the smallest fragment behind in the soil the plant will regenerate and grow into a new plant. Using a rotavator on a plot with bindweed is not a great idea.

Now for it’s flowers. Not only are they rather beautiful, the plant remains in flower for 4 months, blooming from May through to September. This long flowering period ensures a large majority of the flowers are cross-pollinated. Each flower produces a tear-shaped, light brown fruit, which contains between 1 to 4 seeds. On average each plant can produce between 300 to 600 seeds in a year. What’s worse, these seeds can lay dormant in the soil and remain viable for up to 20 to 30 years.

Whilst really difficult to do, it’s important to eradicate bindweed on allotments because the chemicals secreted by the root system can interfere with the germination of some seeds. The most effective way to control bindweed is to painstakingly remove it by hand. Winter, when the plant is dormant, is the best time to try and remove bindweed roots.

Don’t put the roots on to the compost heap, they will grow. Either let them dry out and burn them or place in a bucket of water and leave for a very long time. The roots are full of nutrients and will eventually rot down and form a decent compost.

Whilst bindweed is NOT welcome at the allotment I have to marvel at it’s ability to survive.


Posted in Weeds

Growing Rhubarb

Image

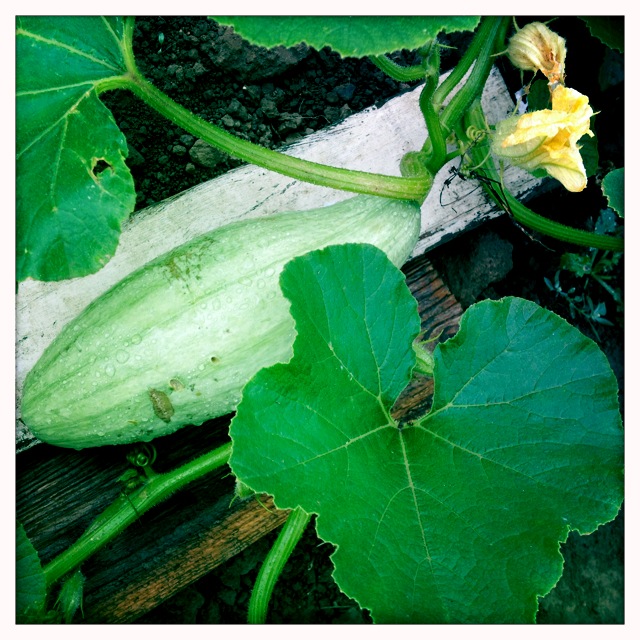
Recently we’ve been admiring the rhubarb grown on the other plots and decided that we HAVE to grow some. Saying that, I know absolutely nothing about rhubarb apart from I love it in crumbles, pies and fools. So, I’ve been busily researching it and here are my findings.

Rhubarb is a hardy perennial that belongs to the Polygonaceae family. It has interesting relatives; this family contains some of the world’s worst weeds, including Japanese knotweed! It’s an architectural plant with large vibrant green leaves on the end of long stalks of varying colour ranging from red, pink to soft greens.

Rhubarb originates from China, Russia and the Himalayas. Its generic name is thought to come from Rha, the ancient name for the River Volga in Russia, where rhubarb grew in abundance on the riverbanks.

Rhubarb is botanically a vegetable despite being used in many puddings. Although rhubarb is an ancient plant, widespread culinary use only began about 200 years ago. Historically the use of rhubarb has been medicinal. Over 5000 years ago Chinese herbalists ground up dried rhubarb roots into powder. This powder was used as a laxative.

Marco Polo talks about the Chinese rhubarb rhizome in his journals following his travels to China. It’s thought rhubarb was grown in Italy as early as the 1600’s. Rhubarb only came to British shores in the 1760’s. It gained popularity in the late 1800’s when the Sugar Tax was repealed in 1874.

Growing Rhubarb

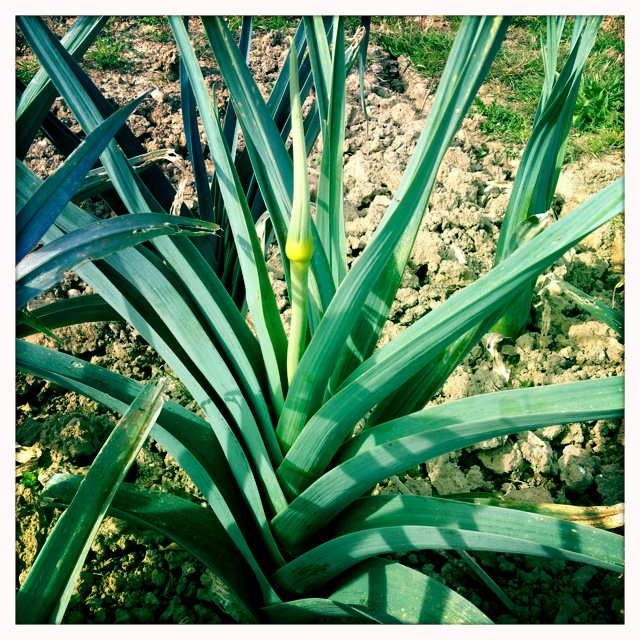
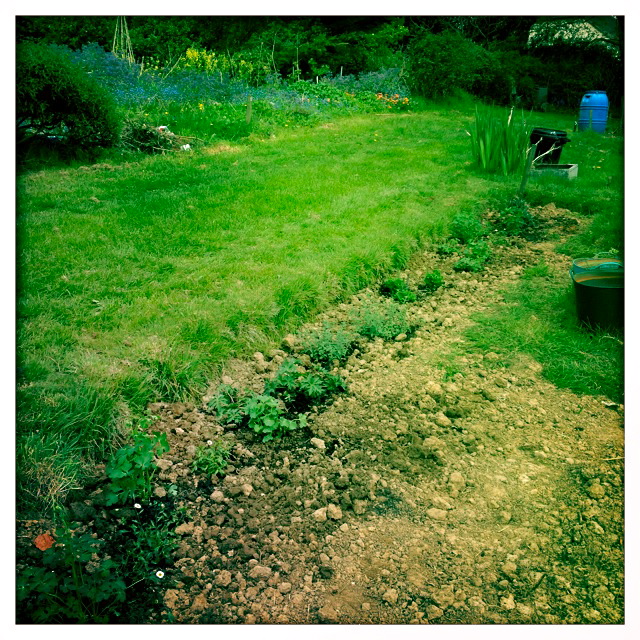
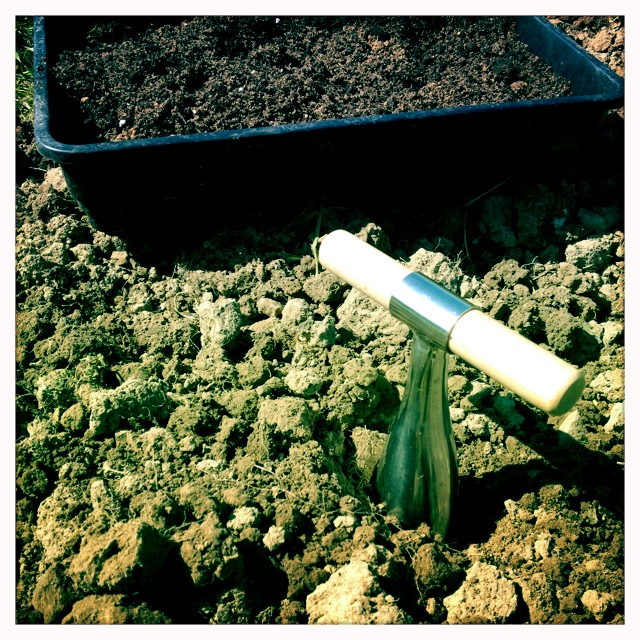
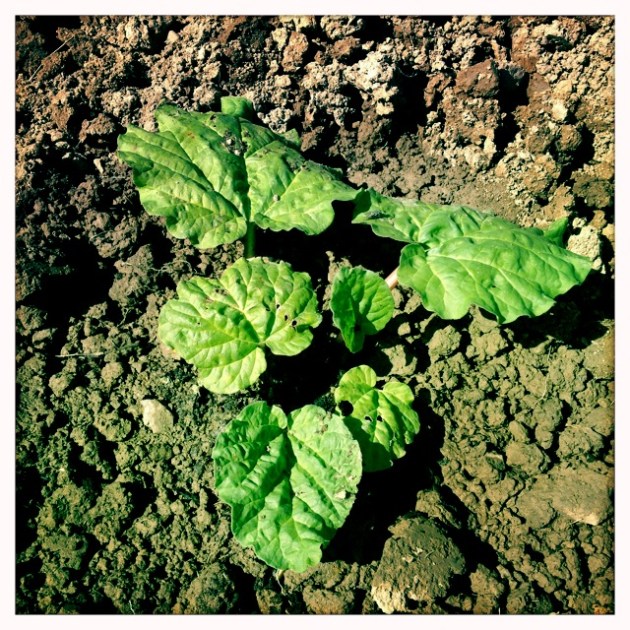
Rhubarb can be grown from seed but it doesn’t always come true. The best choice is to use existing rootstock. Rhubarb is sold as crowns or plants. These can be bought in the local garden centre in the spring. The more unusual varieties can be found online from rhubarb specialists. This is our ‘Timperley Early’ rhubarb plant, planted this week.

Image

Expect rhubarb plants to live for around 7 to 10 years, although some plants live much longer. As the plants will be in situ for a long time it’s worth preparing the ground properly. They are thirsty plants and rather greedy feeders so ensure lots of organic matter is dug deep into the planting space.

It’s best to plant in the spring or autumn when the soil is warm and moist. Saying that, rhubarb can be planted at anytime of year providing the ground isn’t frozen or waterlogged, or if there’s a drought. Rhubarb prefers to be in a sunny or partially shaded position in fertile, moist, free draining soil.

Rhubarb thrives when the summers are damp and the winters are cold and dry. Rhubarb requires an extended period of cold weather, temperatures below 40F for dormancy and temperatures above 40F to 75F to stimulate vigorous spring and summer growth. Temperatures above 90F slow down growth rates and growth may stop completely as the plant becomes stressed when too hot.

Our plot has heavy clay soil and despite digging in plenty of organic matter there is still a tendency for the soil to get a little waterlogged. Whilst rhubarb enjoys moisture, it hates to be waterlogged, especially in the winter. Typically when planting, it’s advised to plant the crown one inch below the soil level. However, given the heavy clay soil, we will plant them slightly higher, so the crown sits at soil level. This will help prevent crown rot. Don’t plant rhubarb crowns too high, as this will dry them out.

As rhubarb plants grow large, some varieties grow as much as 4 to 5 feet wide, space each crown at least 100cm apart.

Maintenance

Once planted, rhubarb is pretty low maintenance. Keep the area weed free and water well during dry spells.

In the spring feed the plants with a general fertilizer and apply a mulch to help retain moisture.

In the autumn the plants leaves die back naturally. Remove all the old rhubarb stalks leaving the buds exposed to the cold winter weather. Apply mulch around the plant taking care not to cover the crown.

As rhubarb is a hardy perennial it is a good practice to divide the plant every 5 years or so to maintain the plants vigour. If the crowns become over crowded the plant may become weak. The best time of year to do this is usually between November and March when the plant is dormant.

How to divide plants.

Use a spade to remove the crown. Then split the crown into three or four pieces, ensuring each section has a piece of rhizome (thickened root) and at least one, but ideally 2 to 3 healthy growing buds.

Perennials produce new growth on the outer edge of the crown. These sections are likely to be healthier and more vigorous than the centre of the plant. In fact, it’s best to discard all the old woody growth from the centre of the plant.

Replant straight away. It this isn’t possible wrap the plant in damp material until ready to replant. Don’t allow the roots dry out.

Harvest

It’s really important not to remove any stalks during the first year of growth. This will allow the plant to produce plenty of nutrients to build up in the plant roots for next year’s growth. Unless the plant is particularly vigorous, then maybe only lightly pick stalks in the second year until the plant is fully established.

Once the plant is established, the general rules are to pick only a few stalks at a time, and never more than half all in one go. Leave enough active foliage on the plant so it can continue to generate sufficient fuel otherwise this will seriously compromise next year’s growth.

Rhubarb is usually ready to harvest in March all the way through to July or August depending on temperatures and variety. Rhubarb growth slows as temperatures rise above 75F and stop growing completely at temperatures above 90F. In the summer, stalks will get shorter and thinner; this is a sign that growth rates are slowing, and it’s time stop to harvesting stalks. It’s also thought that picking stalks beyond mid summer will lead to a reduction in next years crop.

Mature plants can typically be harvested over an 8 to 10 weeks period. Expect 2 to 3 pounds of stalks per plant.

When removing a stalk from a rhubarb plant, it should be pulled out rather than cut out. Rhubarb is highly susceptible to rotting. Leaving a section of the stalk on the plant is likely to promote rot and damage the health of the plant.

To pull a stalk from a rhubarb crown, place your index finger down the inside of the stalk right down to the base. Grip the back of the stalk with your hand. Pull slowly but firmly and twist at the same time, the stalk should come away fairly easily!

The leaf is inedible and should be discarded. Throw it on the compost heap. Rhubarb leaves contains high concentrations of oxalic acid. Rhubarb became infamous in the First World War as soldiers were given rhubarb leaves as vegetables. It killed many of them, poisoned by oxalic acid. Saying that, it’s worth leaving a portion of the leaf attached to the stalk, about 2 to 3 inches. This will help to keep moisture in the stalk so it should stay fresh and crisp for longer. Just remember to remove the leaf before consuming!

If the stalks are soft and mushy then don’t eat them. The stalks may have been damaged by severely cold weather. Extremely cold weather can cause the oxalic acid crystals in the leaves to migrate to the stalks rendering them poisonous.

Potential Problems

Fungal Disease – Crown Rot

Poor soil drainage may lead to a fungal disease, crown rot. The diseased buds on the crown produce weak spindly stalks and the leaves will appear limp. If this happens, dig up the plant and remove all infected areas. Don’t replant the healthy sections of the plant in an area that has been affected by crown rot.
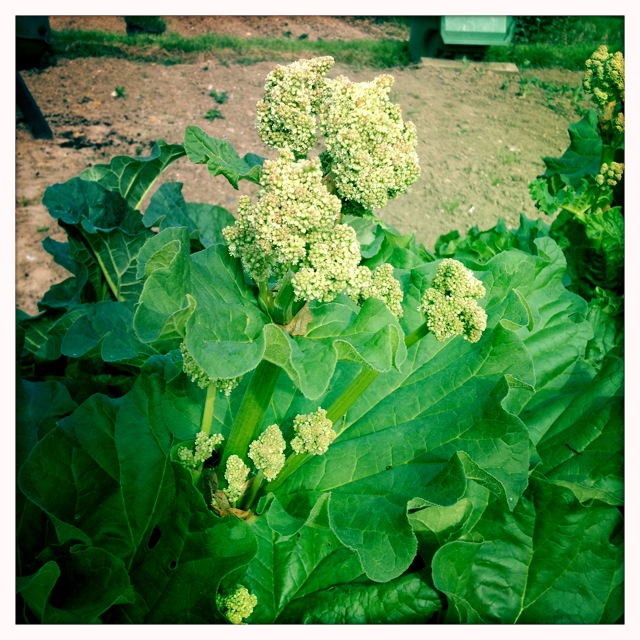
Flower Stem

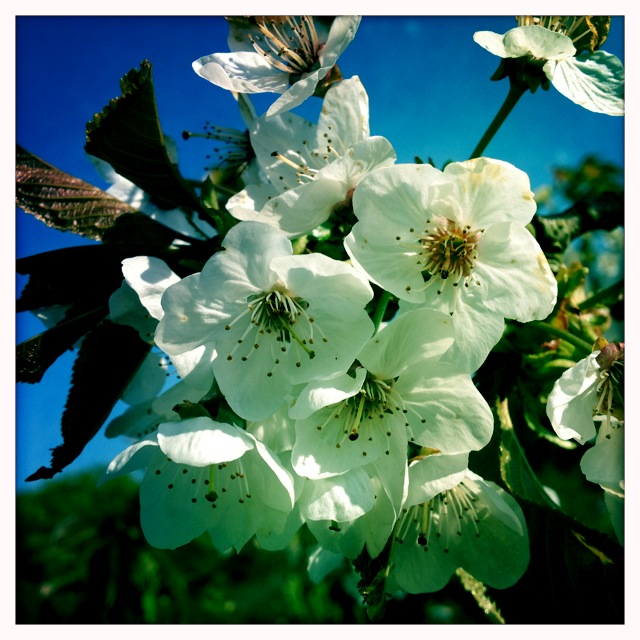
In the spring the plant may produce a flower stem. It looks a little like sprouting broccoli.

Image

Looking around the allotments, there are plenty of flower stems on the rhubarb plants this year. It typically happens on older plants; plants that are three years or older. These should be removed straight away so all the plants energy is directed into stalk and leaf production rather than setting seed.

Using secateurs cut the flower stem as close as you can to the base of the plant. Try not to leave much of the flower stem on the plant, as this will encourage rotting and pesky pests such as slugs. Both of which will damage the health of the plant.

Thin Weak Stalks

This may be a sign that the plant is losing vigour and needs to be divided. Increased feeding may also help.

Split Stalks

This can be caused by erratic growth due to sudden and rapid seasonal changes. For example cool dry periods followed by moist mild weather my cause a sharp spurt in growth causing the existing hard outer growth to split.

Bad tasting Stalks

It’s best to harvest rhubarb while the days are cooler and damp. Warm, dry summers can result in poorly coloured, bad tasting stalks. Time to stop harvesting when you notice this.

Pests

If the summer is dry and hot, flea beetles may damage newly planted rhubarb as they feed on the tender leaves.

The rhubarb curculio beetle occasional attacks plants. It’s a large dark beetle, covered with a dusty yellowish coating and looks rather like an anteater. (See below)

WARNING: Not for the faint of heart!

Image

The adult beetles appear around mid May through to early summer. The beetle punctures the leaf stalks as they feed and lay eggs. These eggs won’t hatch in rhubarb because the rapidly growing stem tissue crushes them. So if you notice holes in the stalks, the chances are that particular rhubarb stalk may not be strictly vegetarian!

Leaf spot

This is a fungal disease. The spores overwinter on old rhubarb leaves and stalks. By removing the foliage and stalks in the autumn this should help prevent this disease.

Posted in Rhubarb

Raspberries!

Today we bought raspberry canes from the garden centre and I’m thrilled. They are currently on my middle balcony enjoying the seaview.

Image

We had two raspberry canes on plot one but sadly they died last year so it was time to replace them. We bought 6 canes, to start with, and this time we plan to plant them on the orchard plot.

We have bought two varieties

  • Malling Jewel AGM: This is an early to mid season summer fruiting variety. Whilst vigourous, it’s fairly compact. It only spreads 10cm to 50cm, although it can grow up to 2 metres high.  It produces dark red fruit with excellent flavour, but fruit production isn’t abundant. This variety is a summer fruiting variety, known as floricane meaning that the fruit will be produced on the previous years canes.
  • Tulameen: This is a mid to late season cultivar. Bred in British Columbia from a ‘Glen Prosen’ cross. It has large, deep pink conical shaped fruit that taste deliciously sweet. This variety is a primocane, meaning fruit will be produced on this years cane. It is easy to grow, and extremely hardy. It has pretty white star shaped flowers in the summer followed by an abundance of fruit late summer. It has a long picking season from mid-July to mid-August.

Now to get that raspberry bed ready!


Posted in Fruit, Raspberries

Allotment Journal – Plot update

We have spent most of this week continuing to prepare the plots, digging over vegetable beds and weeding. We have also planted  the flower border and have been preparing the rhubarb bed on the orchard plot. On plot two we sowed some parsnip seeds.

Orchard Plot

Image

There is a steep drop from the main path onto the orchard plot making it extremely difficult to access, especially with my little legs. It would take a huge amount of work and the addition of lorry loads of new soil and organic matter to build the plot up to the same level as the path. So we decided it was best to plant a flower border across the entire width of the plot and to access the plot from the side.

We went off to the garden centre and had much fun selecting suitable plants, keeping in mind that we want to attract pollen loving insects and bees, and of course for it to look totally beautiful.

We selected a mixture of the following plants.

  • Alchemilla mollis
  • Aquilegia ‘Nora Barlow’
  • Aquilegia ‘William Guinness’
  • Erigeron Karvinskianus Stallone
  • Erysimum Bowles Mauve
  • Geranium ‘Johnson’s Blue’
  • Geranium ‘Mrs Kendall Clark’
  • Nepeta Six Hills Gant catmint
  • Salvia nemorosa Ostfriesland

The plants are fairly small at the moment but should provide a stunning floral display once established in late spring and during the summer.

At the opposite end of the plot we plan to grow rhubarb. Talk about beauty and the beast! That part of the plot hasn’t been touched since we acquired the plot and it’s covered with couch weed. It’s been a lengthy process as all the weed roots are removed by hand. It takes about two hours to dig out a square metre properly. As rhubarb plants are heavy feeders it’s important to dig down deep and add lots of organic matter.

We plan to plant three different varieties

  • Timperley Early
  • Victoria
  • Glaskin’s Perpetual

We’re hoping to get these plants in this week, weather permitting.

Plot Two

I spent Saturday afternoon sowing parsnip seeds. After a fairly cold start the sun came out and the wind died down and it was the most blissfully glorious afternoon. Very cheering.

This is the first time we have grown parsnips so this could be a rather steep learning curve.

Image

We have heavy clay soil filled with plenty of stones, not something parsnips like to grow in. So I used the method described in the Kitchen garden magazine. I found my dibber and made a series of holes, about 8 inches apart. I filled the holes with a mixture of  compost and grit, to help drainage. I watered the compost/grit filled holes and then placed 3 to 4 seeds 1.5 cm deep in each hole. Parsnip seeds are notoriously bad germinators. The lifespan of a parsnip seed is short, old seeds are unlikely to germinate.

Another potential problem is parsnip seedlings have very weak foliage. As the seed geminates the foliage struggles to break through ‘crusty’ soil and as they give up easily they fail to emerge. Hopefully, the free flowing composty/gritty mixture will help with that problem.

The seeds take AGES to germinate, up to a month depending on soil temperature. The soil temperature needs to be at least 46F for parsnip seeds to germinate. We’ve had a good long spell of warm weather so I decided to take the plunge. Besides parsnip seeds can be sowed until the end of May. If they fail we still have time to sow more.

It took a while to sow all the seeds but we now have 4 rows of parsnips. Two different varieties.

  • Gladiator F1: This variety has a RHS Award of Garden Merit. It has silky smooth skin and is supposed to taste deliciously sweet. It is said to be very reliable and has good canker resistance.
  • Tender and True:  A variety that has long tapering roots that grow beautifully straight in stone free soil.. can’t wait to see ours! It’s supposed to have a good flavour and good canker resistance

Image


Posted in Allotment Journal

Pollination.

IMG_6369

Cherry tree,  in full blossom.

The fruit trees have been in blossom for about three weeks and we’ve enjoyed a rather cheery blaze of pretty white flowers on the orchard plot.

The pear tree has lost most of its petals now and we are beginning to see the formation of fruit. See below.

IMG_6363

Essentially trees develop fruit to reproduce and successful pollination is required for fruit to set and develop.

There are two types of fruit trees

Self pollinating – trees that don’t need another trees pollen to complete the pollination process. 

Most apricot, sour cherry, peaches, nectarine and QUINCE trees are self-pollinating trees.

Cross pollinating – trees that need to be pollinated with the pollen of another tree. That tree has to be of the same fruit species but a completely different variety. Two trees of the same variety will not pollinate each other.

Most sweet cherry, pear, apple and plum trees fall into this category.

Fortunately, our 5 fruit trees are planted in a block and there are other fruit trees on the allotment. Bees and other flower loving insects are attracted to the blossom and they seem to  be spreading the pollen around. I’m just a little concerned that I removed one of the cherry trees to make way for the quince tree. However, the cherry tree I removed  is now planted on the plot opposite so hopefully this won’t lead to pollination issues.

So how does pollination work? 

Fruit trees flower early to mid spring. Pollination is generally carried out by busy bees and other pollen loving insects. So far, this spring has been fairly mild, dry and sunny, which has encouraged bee and insect activity. This should lead to successful pollination and good fruit production.

Blossom and the first stages of fruit formation can be susceptible to late frosts. Poor spring weather can lead to poor pollination and a disappointing fruit production.

The reproduction process requires pollen to be transferred from the flowers stamen (male), carried by bees and insects, to the flowers pistil (female) for the pollen to germinate.

flower_diagram

So bees and insects carry the pollen from the stamen from one tree and transfer it to the sticky stigma of another tree. Once the pollen is embedded on the stigma, the pollen germinates. Once the pollen germinates a pollen tube grows down the style (the mid section of the pistil) to the flowers ovary (at the base of the pistil). This is followed by a male reproductive nuclei. This male nuclei fuses with the female ovary and this eventually develops into a fruit.

Temperature also plays an important role in successful germination. Ideally temperatures need to be in the region of 60F to 70F for pollination to be effective. Fortunately we have enjoyed some lovely warm weather over the past couple of weeks.

I’m not saying a word! But I’m going to dust of all those boxes of Kilner jars!!

Posted in Fruit

April – MORE what we’re sowing

Courgettes and winter squashes

Image

Courgettes – Verde Di Milano, Dwarf Bush Courgette

Image

Last year we grew a variety of courgette called ‘Verde Di Milano’, a Dwarf bush courgette, from the Real Seed Catalogue. It grew huge! However, it produced plenty of good sized delicious dark green courgettes. So this plant is a must this year.

Each plant produced in the region of 20 courgettes. it was a particularly good year for courgettes given the warm dry weather. There was a mini glut towards the end of the season so I made some spiced courgette chutney. The chutney is now perfectly mature and eats especially well with a platter of bread, hams and cheeses.

I’ve sown 6 seeds, we plan to put 2 on the orchard plot and 4 on plot 2.

Winter squashes

Blue Banana Squash – The Real Seed Catalogue

Image

This plant is extraordinary. It’s a very rare variety, and I love growing things that are unavailable in shops. This particular squash is an American heirloom, although it originates from Guatemala.

The vine is quite large but not too enormous. The fruit is a silvery bluey grey ‘zeppelin’ shape and grows huge, up to two feet long.

I grew many squashes last year, a total of 14 different varieties.  It was our first year allotmenting on a couple of the plots and they hadn’t been worked for years . They were overgrown and full of bramble, cooch weed and bindweed.  The idea behind the squashes, to discover new varieties but also to get as much of the the plot cultivated as we could whilst continuing to prepare the rest of the weed ridden patch. Anyway I digress, there were a couple of varieties we loved and this was one of them.

It’s easy to peel and has firm orange flesh and it has the most incredible fresh tropical fruit scent. It also stores for a ridiculously long time. I picked the fruit in October and six months later it’s still perfectly fine.

Waltham Butternut Squash – MoreVeg

Image

Although butternut squash is readily available in the shops this is a slightly different variety.

According to the Real Seed Catalogue, it was bred by the Massachusetts Ag. Extension Service in the 1960’s by crossing ‘New Hampshire Butternut’ with a wild African squash. The neck is slightly longer and wider and the seed cavity is a lot smaller. It has lovely rich orange flesh with a great flavour. Like the Blue Banana squash it stores really well.

This squash does take a while to get going, around 15 weeks to reach maturity, so patience is required. I didn’t realise this last year we ended up with a fairly disappointing crop, just a couple of tiny fruits. So starting this off much earlier this year and let’s see what happens.


Posted in Sowing and Growing

Growing Sweetcorn

Image

Growing sweetcorn is an absolute must each year. Shop bought sweetcorn tastes nothing like the sweet, tender freshly picked cobs from the allotment. Ideally cooked within hours of picking to maximize that sweet flavour, with lashings of salted butter. Totally delicious.

Sweetcorn doesn’t belong to any particular cultivar; it’s actually a type of grass. The advantage of this is it can be slotted in any convenient position on the allotment, providing it’s not grown in the same position for too many years in a row.

There are various types of sweetcorn, old varieties, super sweet varieties and extra super sweet varieties. As the name suggests, the super sweet varieties are sweeter than the old varieties, and they retain their sweetness for longer. However, they are less vigorous. The extra super sweet sweetcorn is just a less chewy form of super sweet sweetcorn.

Sweetcorn is extremely tender and will not tolerate exposure to the cold. It grows best when the summers are hot and sunny.

I’ve found, given the external challenges of slugs, mice and birds, plus April’s unpredictable weather, it’s definitely best to start sweetcorn off at home in modules.

Growing Sweetcorn from Seed

Sow seeds indoors from mid April to early May.

Sweetcorn seeds germinate best at temperatures of between 65F to 70F. Seeds will not germinate if the soil temperature is below 50F.

Sweetcorn doesn’t like root disturbance, so sow seeds in deep 7.5cm pots or deep root trainers, at a depth of 2.5 cm using good quality compost.

Water well, label and either cover with cling film/propagator lid and place on a sunny windowsill, or place in a heated propagator.

Germination should take between 5 to 10 days. Although, super sweet varieties are tricky to germinate, the seeds are more likely to rot especially in cool damp conditions.

Once the seedlings are well established, 10 to 15cm high move the pots outside to a cold frame to harden them off before planting them in May/June. Ensure that there is no risk of frost before transferring them outside.

Choose a sunny, sheltered site that has rich fertile well-drained soil.

For pollination purposes, plant sweetcorn in blocks rather than rows. The block should ideally be 4 rows by 4 rows or larger.

Plants should be spaced 40cm to 45cm apart.

Once planted, water them in well and cover with mulch.

Sweetcorn plants don’t need too much attention as they grow. Keep them watered and weed free.

Watering is essential whilst the plants are flowering and the cobs begin to swell. The plants also benefit from liquid feed once the cobs begin to swell. This should help the development of properly formed cobs.

Sweetcorn flowers

Sweetcorn plants, like all grasses, are wind pollinated.

As the plant matures it produces both male and female flowers.

The male flower or tassel is located at the top of the plant; the tassel is full of the plants pollen. Plant sweetcorn in blocks to ensure pollen isn’t just blown away. As the wind blows through the plants tassels pollen is released down to the female flowers or silks.

The female flower or silks is situated lower down the plant, on the axle of a leaf and the stem. The female’s sticky silks collect the pollen, which embeds itself. Over the next 12 to 24 hours the pollen grows a tube down the length of the silk. Successful pollination leads to the development of plenty kernels. Poor pollination leads to cobs that have lots of missing kernels.

Sweetcorn plants are in pollination mode for around 10 days. This starts when the male flowers open up and dangle down like bells. The highest quality pollen is usually shed from mid to late morning. To ensure good pollination it may be advisable to assist the plant by hand pollinating. Take some male tassels and brush them against the female silks. This should be repeated a few times over a number of days.

As it’s so easy for pollen to get blown around the allotment don’t grow super sweet cultivars close to other cultivars as cross-pollination reduces sweetness.

Harvest

Sweetcorn cobs are ready to pick when the silks turn brown. Carefully pull back the leaves and pinch a kernel. If the juice is milky the cob is ready to pick. Harvesting usually takes place from July through to September.

Potential Problems

There are no major problems growing sweetcorn. The main issues are from pests. BADGERS have been known to be quite partial to the odd cob!!! Last year a particularly thuggish gang of magpies destroyed our sweetcorn. We plan to grow many, many more plants this year to avoid dissapointment.


Posted in Sweetcorn

Quince Tree

Image

The quince tree has been planted! It looks rather magnificent. We are overjoyed.

The plot is made up of heavy clay soil, so we dug lots of organic matter into a large hole to help the tree get established.

We’re not expecting any fruit this year despite the amount of blossom. We think the tree may be a little young to produce fruit, but we will see.


Posted in Fruit
Calendar
February 2026
M T W T F S S
 1
2345678
9101112131415
16171819202122
232425262728