
Last week was a bit of a scorcher and with long daylight hours and me watering like a crazy thing the seedlings are coming along pretty well. The seedlings I have on the go at home are also thriving. Now to find a home for them!
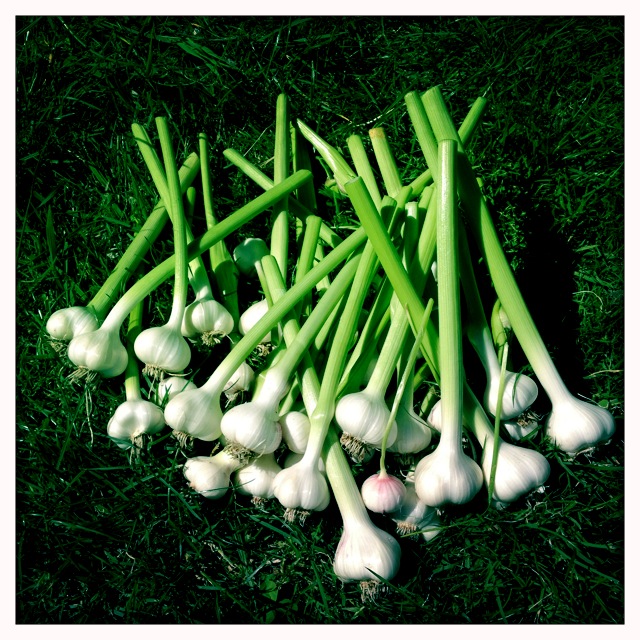
We harvested the garlic as it was covered in rust and looking rather yellow. And I’m yellowist!

The Purple white variety produced really good sized bulbs, whilst the Germidor and Iberian Whites were smaller. We experimented this year with modules of garlic. The soil at the allotment is heavy clay and garlic hates to be water logged. We planted cloves at the allotment in October in a combination of compost, soil and sandy grit. At the same time we planted modules at home in compost. The garlic in the modules grew really well and looked incredibly healthy. We planted these modules at the allotment in late winter. The modules never really caught up with the garlic planted in situ, the garlic bulbs, including Purple Whites, were smaller. Maybe if we didn’t have such a bad case of rust we could have left them in the ground to develop further.
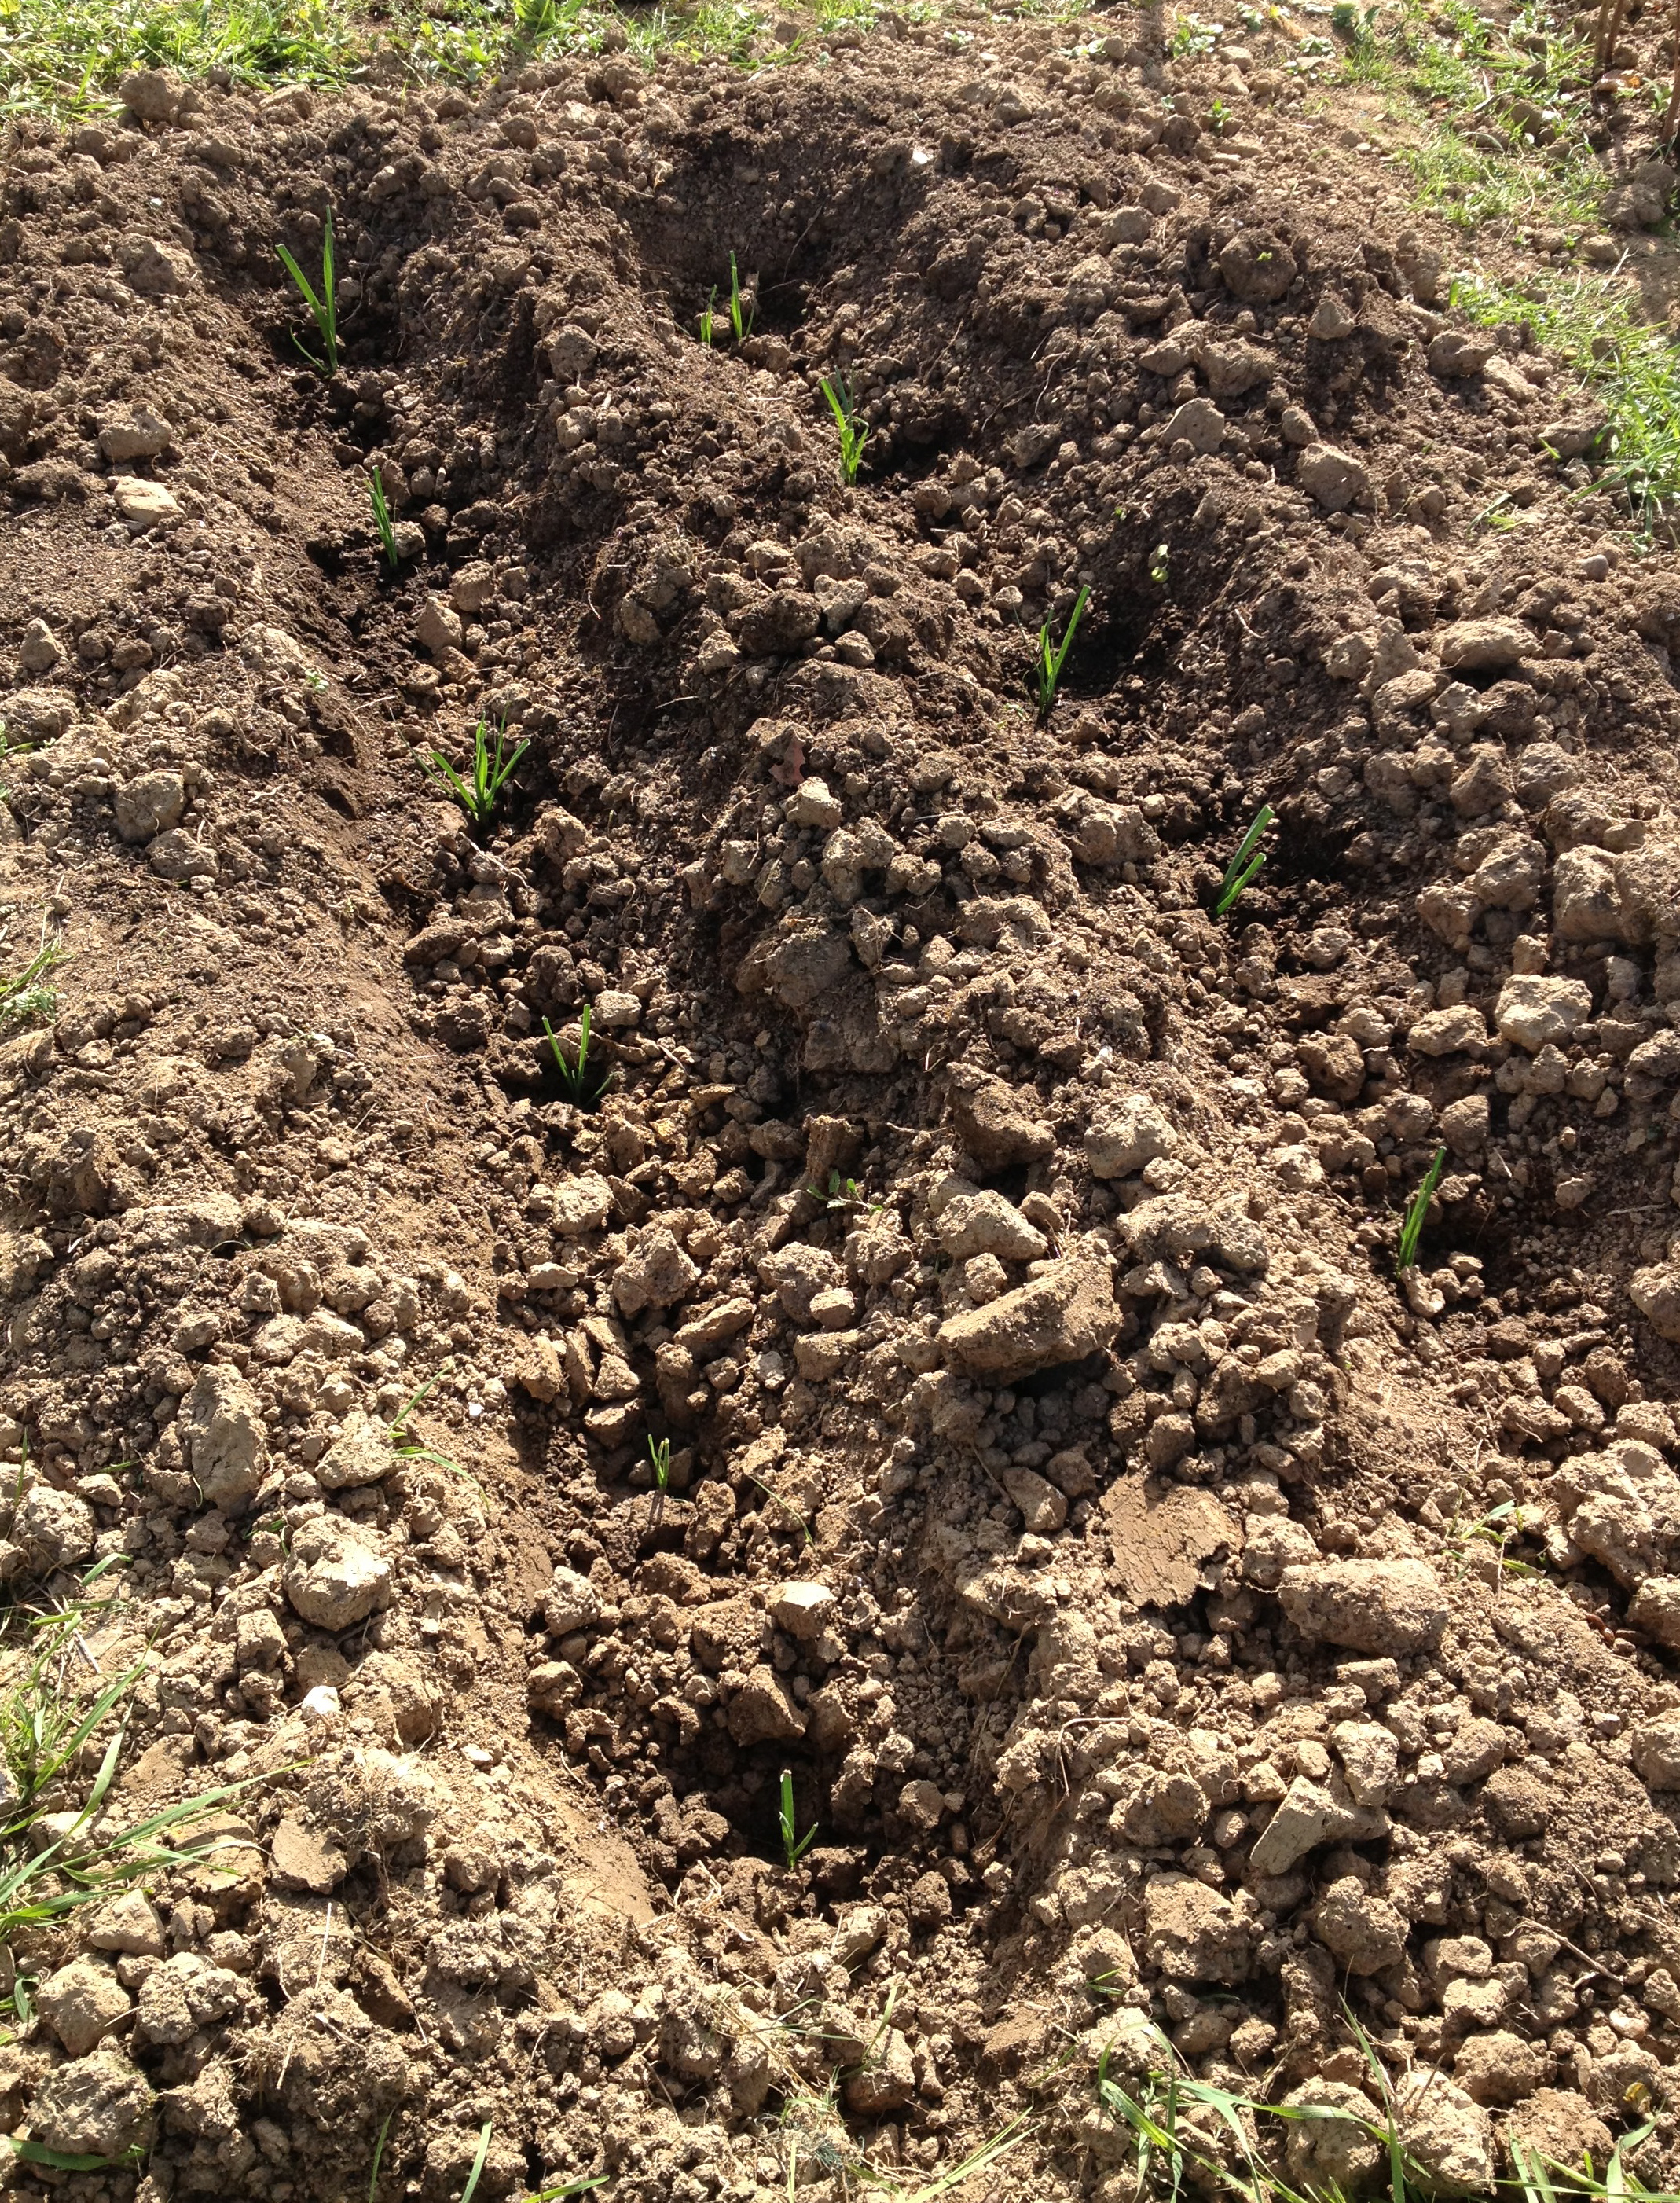
Another experiment, this time with growing beetroot in modules.

Beetroot is one of those vegetables that should be grown in situ so we haven’t tried this before. The problem we have with growing beetroot at the allotment is the snails and slugs love to eat their way through the newly sprouted beetroot leaves. The seedlings usually last about a day, there one minute, gone the next. I’ve seen a couple of people at the allotment grow beetroot in modules and plant out the seedlings when they are a couple of inches tall, so i thought I would give it a go. I sowed Boltardy and Touchstone Gold and it took about three weeks for the seedlings to reach a couple of inches. We planted the seedlings where the garlic had been. Now to see if transplanting them will impact the actual root development. i’ll keep you posted.
Barry, a fellow allotmenteer very kindly gave us some of his leek seedlings. Mine have been an absolute disaster this year, I’ve sown some more but they are way behind, they resemble grass at the moment, so it was good to actually get some in. Barry has been growing vegetables for years and he gave me firm instructions on how to plant them. Dig a deep trench. Use a dibber to make a good deep hole. Top and tail the leeks, i.e. cut off about a third of the foliage and trim the roots; this invigorates the root system. Place the trimmed leeks in the hole and water. The water should collect some soil thus covering the roots. I usually do all of this apart from diggind the trench… and this is why…
It looks rather ugly! Great mounds of lumpy clay soil, totally hideous and at the front of the pretty orchard plot. The only advantage of this method is it helps ‘blanche’ or earth up the leek stems, so we should get more white bits! Personally I’m not all that bothered about that, but I know Sal will be pleased, she always mentions there is never enough white bits on our leeks. And hopefully Barry will be happy too. Can’t wait to dig in that trench… just sayin’!
In previous years we have been unable to eat the globe artichokes because aphids have settled on them and hundreds of them literally moved in to the globe itself. We tried putting fleece over them last year as Carole Klein from Gardeners World suggested, but that failed. Globe artichoke and aphid soup… Mmmm my favourite! But this year Sal came up with an inspired idea, it’s genius. She noticed that the aphids gathered under the globe itself and settled in the shelter of the leaves close to the globe.

She removed the leaves directly under the globe and then removed…….. okay squashed, all the aphids. With no where to settle the globes have remained aphid free. The loss of leaves hasn’t impacted the growth rate of the globes, in fact these are the biggest and healthiest globe artichokes we have ever had.

We’re now looking forward to enjoying aphid free globe artichokes this year and for many years to come.
It’s time to plant out the brassicas but they are susceptible to attack from birds and also the pest of 2013, the cabbage white butterfly. So it’s really important to protect them with netting. Last year I constructed some ‘very allotment’ contraption from an old fruit cage, bamboo sticks, garden ties, string and a bit of old sticky backed plastic…. actually not that very last bit, that was Blue Peter! This year I’m making it look a bit prettier… it’s all relative!

The wonderful Barry came over to help me bash the posts into the ground. Apparently our rubber mallet wasn’t the right tool, and with that he produced his iron mallet! Not sure it made much difference as the soil is like concrete at the moment, we desperately need some rain, but it was so kind of him to come over an help this ‘damsel in distress’. This week I plan to finish constructing it so I can get some more kale plants in.
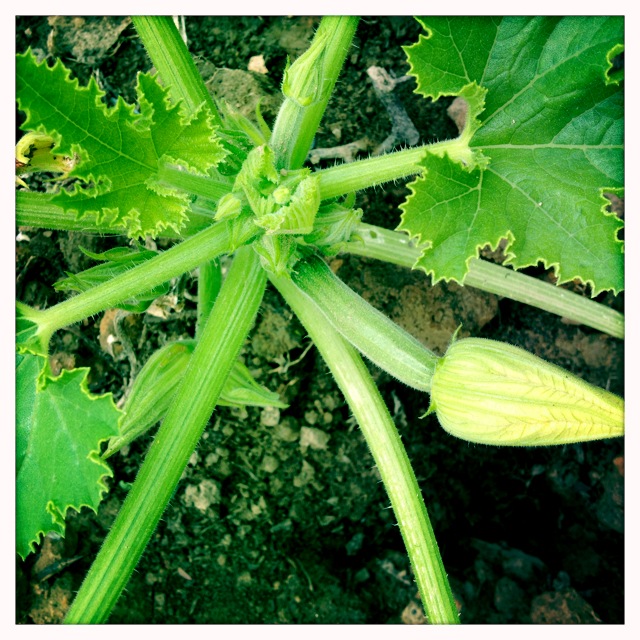
We have our first courgettes emerging…
Some raspberries are forming….

And finally Discovery Apple tree update… the apples are growing rather nicely! Excited


Leave a comment